I hope there was someone who guided me when I was setting up my own site 5 years ago (I started writing in June 2015, was traveling whole of July and finally became serious only by end of August 2015 and bought my own domain).
There are millions of articles on the internet. But it is so vast that a comprehensive one gets lost and it is very difficult to find a relevant one. This article is an attempt to consolidate all these into one.
You may ask if I have the necessary qualifications to write this article. Maybe not. I am still in the learning phase and there are things that I learn every week. I am just trying to help all fellow new bloggers like me. I may not have the innumerable follower count but I have decent webpage stats and I have received good feedback. Since I do not intend to earn any income from this, this is absolutely fine with me.
Note: Most of the tips are relevant for all travel bloggers but some may be relevant to only people who use blogger. Also some of them are relevant for all bloggers.
Table Of Contents
- 1 Choosing the right blogging platform:
- 2 Website hosting:
- 3 Choosing a template:
- 4 Adding Share Buttons:
- 5
- 6 Adding Follow buttons:
- 7 Adding a Favicon, Navbar, Header and Searchbar
- 8 My Right Bar Widgets:
- 9 Instagram Feed:
- 10 Twitter Feed:
- 11 Zomato Plugin:
- 12 Adding dropdowns/ sub menus in Blogger:
- 13 Comment Customization:
- 14 ‘Read More’ option
- 15 Canva:
- 16 Flickr Creative Commons:
- 17 Buffer:
- 18 Crowdfire:
- 19 Groups/ Boards/ Communities
- 20 Aviary:
- 21 Bloglovin, Indiblogger and BlogAdda
- 22 Add About me/ Contact Me pages:
- 23 SEO (Search Engine optimization):
- 24 Including Songs in a video blog:
- 25 Things I am still learning:
Choosing the right blogging platform:
Many people are stuck at this point. Which one is better? Blogger or WordPress or something else? There are varying opinions on this one. Many people advised me to switch to WordPress due to its flexibility and option of user-friendly templates. I have stuck to blogger only for sentimental and nostalgic reasons.
I created this blog way back in 2008, posted a couple of blogs and then went dormant for the next 7 years. There are days when I get frustrated with blogger and have second thoughts. This was one of the reasons I moved to WordPress in March 2017.
Website hosting:
It is your personal decision if you want to host on your own domain. If you decide to do, then find the one that suits your need. I did not want anything complicated. So I chose EasyDNS . Once I purchased my domain, I set it up using these tutorials. It is fairly simple and you do not have to break your head over it.
Choosing a template:
You have to choose a template. I experimented with all default blogger templates and then decided to choose ‘Ethereal’ one for now. In case you do customizations like me, then every time you change the template, you lose some of the changes you made to the previous template.
Since I have some familiarity of editing html pages in my daily job, I keep adding customizations by going to ‘Template’ -> ‘Edit HTML’. I am working on developing my own template as well. It is better not to go for any free templates available since they screw up your page and it is difficult to revert. I learnt this the hard way.
Blogger by default has really crappy share buttons. In this world that is enamored by sharing everything, it is really critical to have a good sharing tool. I use ShareSumo or Sumome for this purpose. It works like a charm for me and it has helped me to reach out to an even wider audience. In addition to Share buttons, you can also add a ‘Scroll Box’, a ‘Contact Us’ form, image sharer etc. Very easy to install and SumoMe – Blogger . When setting it up, make sure that it works on mobile as well.
Everyone wants to increase their follower count on all their Social Media profiles. Blogger again provides a crappy widget that does not work half the time. One useful tool is AddThis and you can use this to add your follower buttons. They have a sharing tool as well but I prefer Sumome. You can use this great guide for configuring your AddThis functionality. AddThis – Setting Up
Favicon
Favicon is the small picture you see beside your site’s web address. This helps in jazzing up your site. You can use this tutorial to change this in Blogger. Favicon
For blogger, this comes as default for most themes. Else you can manually add this. I will explain more about this below.
Search Bar:
This is essential for a website and it helps the reader to search using keywords. You can use the default one or you customize this using this guide. Search Bar
My Right Bar Widgets:
In Blogger, this is one of the most useful tools. You have an option of adding default ones as well as some HTML/ Javascript widgets. I will break it up into sections for better clarity.
Facebook Page Plugin:
When I was researching what widgets to add to my page, I saw that for travel blogs, the most popular one is the ‘Facebook’ like page. So most websites these days have a Facebook page and you would love for some likes on that page. Here is how to set it up: Facebook Page Plugin
Instagram Feed:
You have a great Instagram feed and you want that to be displayed in your web page. I use Intagme and you can set it up at a click of a button. It displays around 20 recent pictures from your feed in a slideshow format.
Twitter Feed:
Another great widget you can add is the Twitter feed. You have an option of creating these widgets and then displaying it in your blogs. More details here: Twitter Feed
Zomato Plugin:
I got the custom HTML/Javascript code (Add Widgets) from Zomato and I use that here to display my Zomato stats
Miscellaneous:
In addition to this, I have added some other widgets like ‘Popular Posts’, ‘Blog archive’, ‘G+1 button’ etc. There are many more widgets and you can add the ones you find relevant.
One of the biggest drawbacks of blogger is that it does not provide the flexibility to easily add dropdowns in its navigational menu. Most people end up using the category search option Categorize Search . But this is not as interactive as I wanted. With the help of this tutorial I was able to create dropdowns in blogger and this has been a great help for me Dropdown Menus in Blogger . This is by default black and red. But we can alter this to fit our needs by changing the CSS colors.
Comment Customization:
Another thing I did not like about blogger was the comments button. First of all I went to ‘Settings’ and changed it to ‘Embed Comment’ under ‘Posts and Comments’. Then I changed the comments button using these tutorials Comment Customization.
‘Read More’ option
It is funny how I did not know about this till 2 weeks back. It helps keep your homepage concise and not too long.
Canva:
Pinterest is one of the best websites that is available to drive traffic to your blog. Pinterest is all about beautiful images. But most boards/ communities are very strict about vertical pins. What does a vertical pin mean? It means exactly that, a pin that is vertical not horizontal. I don’t know the logic behind this though. So how do you create a vertical pin?
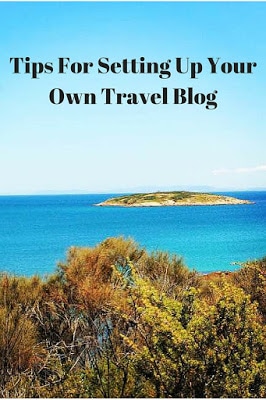
You can login to http://canva.com. Choose the Pinterest template. Upload your picture. Drag it to the editor and resize accordingly. Add your wordings and download the new picture. Voila you are done. I had a tough time figuring this out till someone helped me in finding this very helpful site.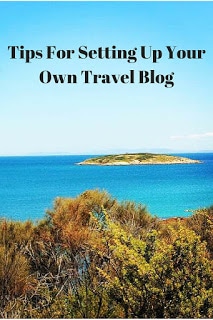
Flickr Creative Commons:
Sometimes you have trouble finding the right picture for your blog post. It could be that you do not have good pictures since they did not allow taking pictures there or because it is part of your wishlist and you have never been there. Whatever the reason may be, you have an option of finding a mind-boggling pictures. I bring to you Flickr Creative Commons.
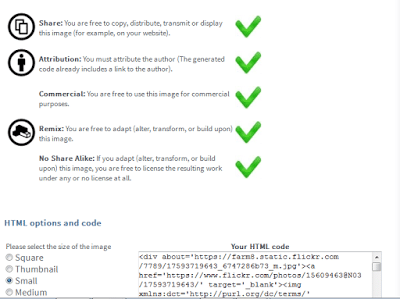
Flickr is a website where people upload their pictures. If it is filed under ‘Creative Commons’, then some photographers allow you to download and share their photographs. The only condition is that you have to give credit to the photographer (Attribution) in your blog posts. So how do you do that? Log in to Image CodR . Go to the Get code page and type in the URL of the image. If it is under the ‘Creative Commons’ license, this page gives you the details and you can copy and paste the html code in your blog posts.
Buffer:
Buffer is a good tool if you want to schedule your tweets. It is critical that you post your tweets at the right time to hit the target audience. You can connect your Facebook page as well.
Crowdfire:
Crowdfire is an excellent tool that helps you keep track of your followers on both Twitter and Instagram. You can see who do not follow you back. Various other stats are available and you can even automate a message when someone new follows you on Twitter.
Groups/ Boards/ Communities
This is a must for all new bloggers. Get yourself added to the relevant Facebook groups/ Google communities and Pinterest boards. They are a great source of information and you get to meet many likeminded bloggers like you. They are good to get traffic to your site too.
Aviary:
I do not use photo editors as much as I need to use them apparently. I am still learning and I have recently started using Aviary and I have started loving it.
Bloglovin, Indiblogger and BlogAdda
This is a must for all Indian bloggers. I registered only 2 weeks back and I am getting a good deal of traffic from here as well. I need to be more active on this though.
Add About me/ Contact Me pages:
Pretty self-explanatory. You can find mine here. About Me
SEO (Search Engine optimization):
This is a vast topic and it cannot be covered in one post alone. Again I am also in the learning phase and I learn a few things everyday. But still a few things to remember about SEO:
- Title of your blog posts should be SEO friendly. Concise and to the point so that search engines can find it.
- Add Search description (meta tags) and labels for all your blog posts.
- Add valid caption for all your images.
- Add valid properties for all your images
- Place Keywords in the blog post accordingly. Do not overuse them though.
- Ensure that your custom permalink includes few keywords.
- Back link building
- Have a landing page and a sitemap for your website. Still working on this one.
- Use headings and titles for all your pages.
- Many more tips can be found here: http://www.whatisseo.com/
Including Songs in a video blog:
I need some background music to include in my video blog that I am in the process of making now. But I want to buy the rights for a minimal amount. What do you suggest that I use? http://soundcloud.com or http://audiojungle.com
Things I am still learning:
There are so many things that I am learning still. StumbleUpon, Triberr, Reddit etc. I would love it if you guys/gals can help me in this regard.
So that is it from me. Please do let me know your inputs below.
This post was selected on BlogAdda as one of the ‘Spicy Saturday Picks’



I thought this was a great article for anyone looking to start a travel blog. I found some plugins that I may use or switch around.
Thank you. Please do let me know if I have missed any
Justine I pay 35$ Yearly. There is a cheaper option of 15$ yearly as well.
You've given a great basis for getting started! I'm checking out a few of the tutorials of stuff I've been putting off. Thanks.
Thank You Michelle.
how much do you pay for hosting?
Great first insight to blogging. 🙂
My biggest problem is traffic! I seriously need help! I've tried to sign up for directories, but we're too new and don't have the following they want. Any advice? #thecottondiaries.com
Thank You Danik.
Cool post! Actually I ended up removing my instagram plugin because it was making my site slow by a few seconds. I'm super particular about the speed because it effects SEO 😉
Will see for a few days. Will remove it if my site takes long to load. Thanks Sonal
Hi Kissa It was difficult for me too in the beginning. But slowly it has been growing. Keep at it and all the small things will help
hi,
this information is very helpful for every one … thanks for shear this post…cool..
Thank You. 🙂
This is great blog .. I just love to explore and write about the new places .. Thanks buddy !!
This is nice post.It is also very helpful for us .I have been searching this types of tutorial because .I love visiting
some day days ago i read an artical about travel Niagara but this post is better then post